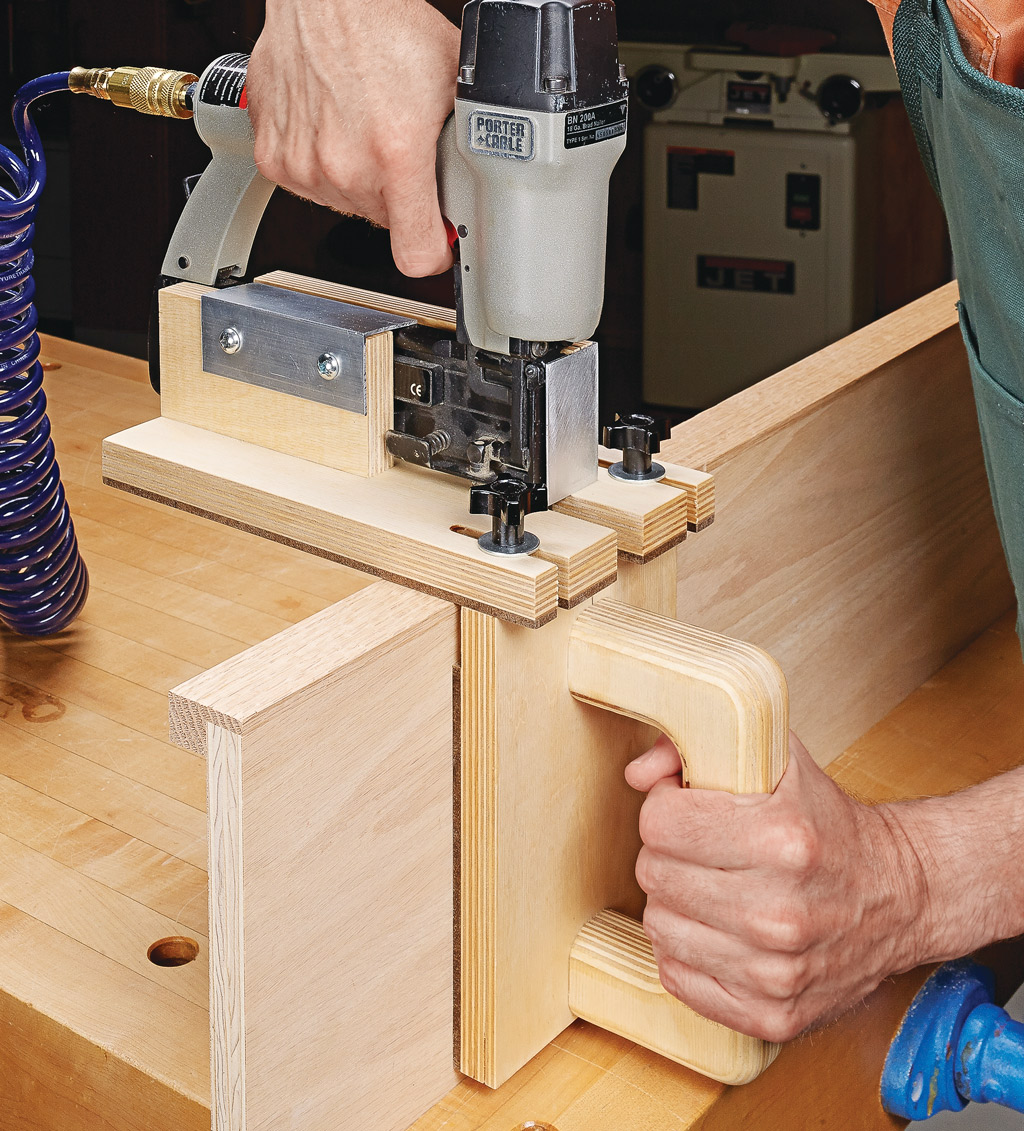
 Brad nailers sure are handy for speeding up assemblies, but they have a frustrating tendency to cause nails to “blow out” the side of a piece and mar your finished work. This is usually caused by not holding the nailer square to the workpiece when driving in the nail.
To make my nailer more accurate, I created the handy guide you see above. It ensures that the nailer will always be perfectly square with the work when driving in nails. And it’s adjustable to center nails on any thickness of workpiece.
 The two main assemblies for this nailer guide are a base and a fence. The base is an assembly of plywood and hardboard. A centered slot accepts the nose of the nailer and two adjacent slots are used to secure the fence. The base also has a couple of support blocks with aluminum brackets that are used to secure the nailer.
 As for the fence, it has a couple of knobs at one end that fit the slots on the base. This makes the guide adjustable for different thicknesses of material.
 And an added handle makes the guide easy to use (photo above).
 Once the guide is complete, you set the nailer in place between the supports and add the aluminum brackets to lock it in place. Then adjust the fence in relation to the base to center the nose of the nailer on your workpiece. Lock down the knobs, and then you’re ready to drive nails by sliding the guide along the piece as shown above.

Special Offer


