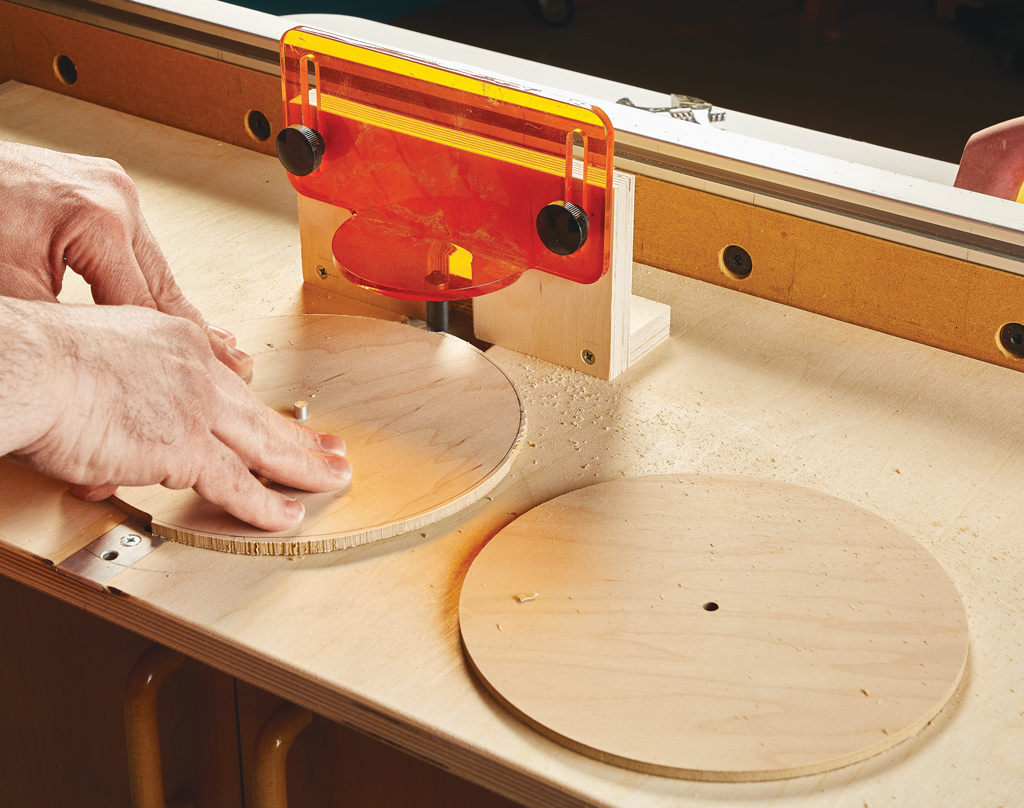
The router table is without a doubt, a versatile tool. Rabbets, dadoes, grooves, tenons, box joints, moldings and profiled edges - you name it, the router table can usually handle it. However, you might think that turning to the router table to shape round workpieces sounds like a stretch.

Pardon the pun, but the truth is that there are a couple of very straightforward router table techniques that allow you to create perfectly shaped circular panels or dowels. I'll share the basics of each one with you.
TURNING CIRCLES
You may be familiar with the technique for using a router fixed in a trammel to "spin" a perfectly circular workpiece. It's a great way to shape round tabletops or other large, circular pieces. Making round workpieces on the router table works similarly, only here the router and bit are stationary while the workpiece rotates.
A SIMPLE JIG. The key is a barebones jig made up of an auxiliary tabletop, a swing arm, and a stop (left drawing above). Construction of the jig is very easy. All of the pieces can be made from ¼ hardboard.
To accommodate the swing arm, I sized the top to overhang the sides and front of the table. Then I laid out and drilled a 1"-dia. hole for the router bit. After drilling a series of pivot pin holes in the swing arm, it's attached near the front left corner of the top with a bolt, washers, and nut. The stop is just a narrow cutoff.
SET UP. A look at the drawings above and a brief explanation are all it takes to understand how the jig works. To set up, a straight bit is installed in the router table (I like to use a spiral flute up-cut bit) and the auxiliary top is positioned over it and clamped down. Then, after drilling a small centered hole in the rough-shaped workpiece, it's placed over the pivot pin (a nail) in the swing arm. Finally, you'll clamp the stop in place to limit the travel of the swing arm and produce the desired diameter.
THE SPIN. With everything ready to go, you simply turn on the router and pivot the arm and workpiece toward the bit. When the arm contacts the stop and the bit is engaged, you slowly and steadily rotate the workpiece counterclockwise. After a full turn or more, retract the arm with the trimmed workpiece.
A FEW TIPS. It often works best to sneak up on the final diameter by trimming the workpiece incrementally, especially when routing solid wood. You'll get a smoother end result. You simply move the stop back a little bit between passes.
Be sure to maintain a good grip with both hands as you rotate the workpiece. And you'll need to apply constant forward pressure to keep the arm in contact with the stop. I'll usually make a couple of revolutions to be certain I've cut to full depth all around the perimeter of the circle.
MAKING DOWELS

Making dowels of many standard diameters (down to 3/8") in any kind of wood is as simple as routing a roundover - or rather, four roundovers. In a nutshell, a square blank is "turned" round by knocking off all four edges (corners) with roundover cuts.

GET READY. I'll illustrate with an example. You start by milling an extra-long, square blank matching the diameter of the dowel you want to make - let's say 3/4". Then you install a roundover bit in the router table that corresponds to the dowel's radius. This would be a 3/8" bit.
Next, I add a long auxiliary fence to the router table. This simply provides the support you need to make longer dowels, as you'll see (drawing above).

The fence is aligned flush with the bearing of the bit. The height of the bit is adjusted to align with the fence's base.
MAKE A DOWEL. When you make the four roundover cuts, you need to maintain square reference edges to keep the blank from rolling. You can do this by not routing a short section at both ends of the blank. I like to mark a reference line about 2" to either side of the bit to show me where to start and stop the roundover cuts.

That's the hard part. The rest is easy. With the router turned on, align the left end of the blank with the start line, pivot it into the bit and feed it slowly until the right end reaches the stop line. Then give the blank a quarter turn and repeat the process.
When routing larger diameter dowels, you'll get a better result by working down to round. Set the fence for a partial cut and then move it after a series of passes.
Once all four edges have been rounded, the ends of the blank can be cut off. The dowel will be perfectly round or pretty close to it. A minor sanding will be all you need to smooth the surface.


