
A solid-wood top made from glued-up hardwood strips is both attractive and very functional. It shows off the straight grain and is less prone to cupping or splitting than a single, wide piece, even when it gets wet. So it's no surprise that it's a popular choice for kitchen worksurfaces.
The second photo above shows an edge-grain top as the worksurface on this kitchen cart. This is the perfect application for an edge-grain lamination.
CHALLENGES. But if you've ever struggled to glue up a solid top, chances are you've probably encountered a few problems along the way. For instance, the lumber in my shop seldom stays perfectly flat and straight. Nor does it all have a pleasant, uniform color. So unless I pay careful attention and take steps to solve these problems, the finished product won't look as good as the photo above.
However, if you break the process down into a few simple operations, you'll get predictable results every time. It starts with choosing the right wood and milling it properly. Then, you need to take the time to work out the best color and grain match by arranging the individual workpieces.
Finally, the key to a good assembly is to glue up the top in sections. This not only keeps the size of the individual glueups more manageable, but it also allows you to take advantage of your planer to smooth the face of each section. Then you only have two or three joints to worry about in the final assembly. But it all begins with a trip to the lumberyard.
START WITH THE RIGHT STOCK. There's no doubt that maple is the first choice for a laminated top. It's hard, fairly stable, and has very attractive edge grain. Ash is another option, offering slightly better stability if not as tight a grain pattern. Of course, you can use these techniques with any wood. In fact, I've made some very nice-looking tops for shop projects using inexpensive, "twoby" construction lumber.
WHAT TO LOOK FOR. No matter what species you choose, there are a few rules of thumb to keep in mind as you pick through the stock to select the individual boards.
First, find flatsawn boards. Ripping them into strips and flipping them on edge will expose the straight, edge-grain pattern. You don't want quartersawn lumber for this kind of assembly.
Straight-grain stock with consistent ring spacing and uniform color will result in the best-looking top. (You can check the end grain of the boards to see how closely the rings are spaced.) I try to avoid boards containing contrasting sapwood and heartwood.
THICKER IS BETTER. I usually choose 1 3/4"-thick stock for an edge-grain glueup. It not only makes a greatlooking top, but it also tends to be a little more stable after you cut it. You can use 3/4"-thick stock, of course, but the narrower strips will give a different look to the top (and double the number of strips you'll need to glue up).

PREPARING THE STOCK. Planing the stock before ripping it into strips makes the whole process easier. In most cases, the face of the board will become the glued-up edge joint in the finished product. So getting both faces as flat as possible is a great way to start.
Before you begin, check the knives in your planer. If possible, install a fresh (or recently sharpened) set. This can nearly eliminate further jointing work.

Keep the workpieces extra long while planing (about 6") and cut them to final length later. This makes it possible to cut off snipe. Snipe will result in gaps in the ends of a glued-up section.
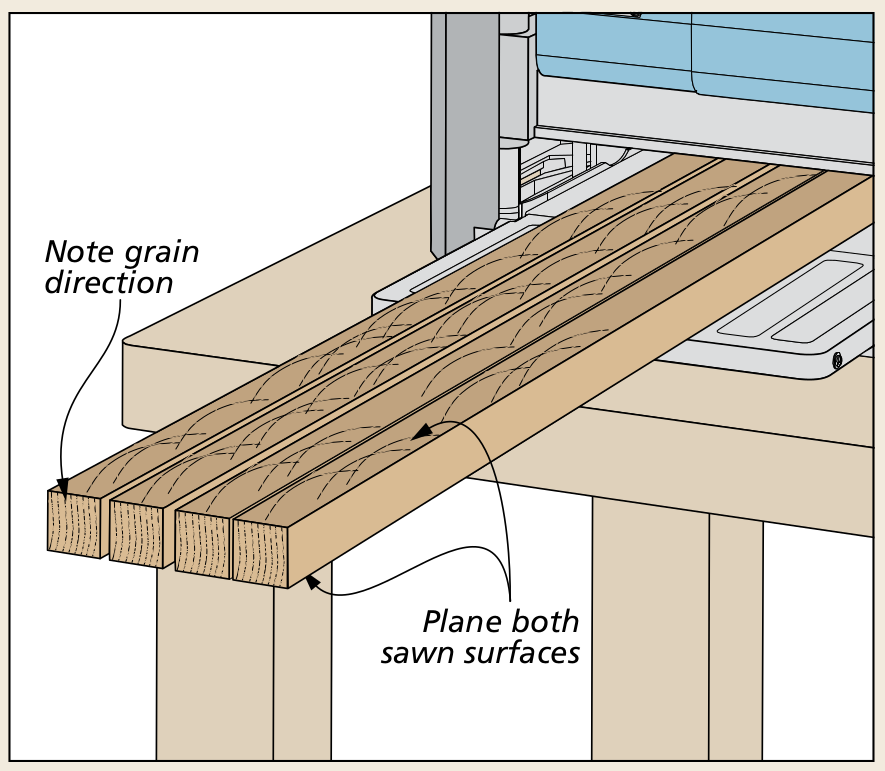
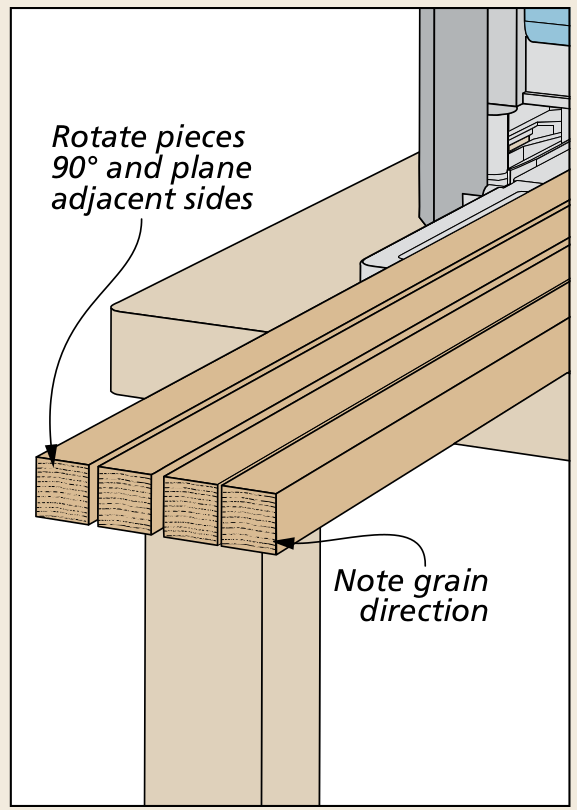
Finally, before you begin running boards through the planer, check the grain direction on the edge of each one. The point here is to identify which end to put into the planer so the blades cut "downhill." The drawings above and the photo below show you what I mean. By taking the time to identify the correct feed direction, you can avoid tearout in the planer. And since the planed face will eventually be a joint, this prevents gaps and unsightly voids in the joints on the finished top.

PLANING. Now you can start planing the workpieces. The key here is to take light passes. I plane both faces so each ends up flat and ready for gluing. In order to avoid tearout, you'll need to feed the opposite end of the board into the planer as you flip it over to plane the opposite face.
JOINT ONE EDGE. Now you can prepare the workpieces for ripping. And for that, I move to the jointer. Once again, pay attention to the grain direction as you pass the boards over the jointer (as in the drawing below). When you're done, it's time to head over to the table saw to rip the workpieces.
RIPPING, PLANING & ASSEMBLING
It may seem like you spent a lot of time selecting and preparing the stock. But by taking the time to do it properly, you've made the rest of the process easier. Now you're ready to start ripping the wide boards and assembling the top.
SET UP THE TABLE SAW. Ripping thick hardwood stock can be a challenge. But there are a couple of things you can do to guarantee safe and smooth sailing.
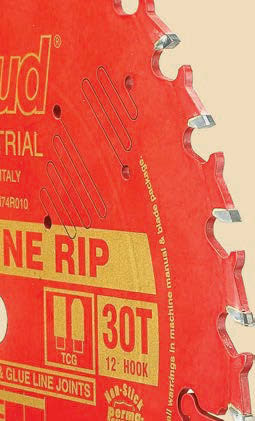
RIP BLADE. For a quick rip cut in thin stock, a combination blade is fine. But when you set out to rip lots of thick hardwood, you need to install a good rip blade. A thinkerf blade can also be a big help in an underpowered saw.
Now is the time to make sure the blade is square to the table and the fence is parallel to the blade. It's also a good idea to give the stock a final inspection before you begin ripping the wide blanks. Check to be sure each piece sits flat on the table saw without rocking. Any rocking can cause dangerous kickback.
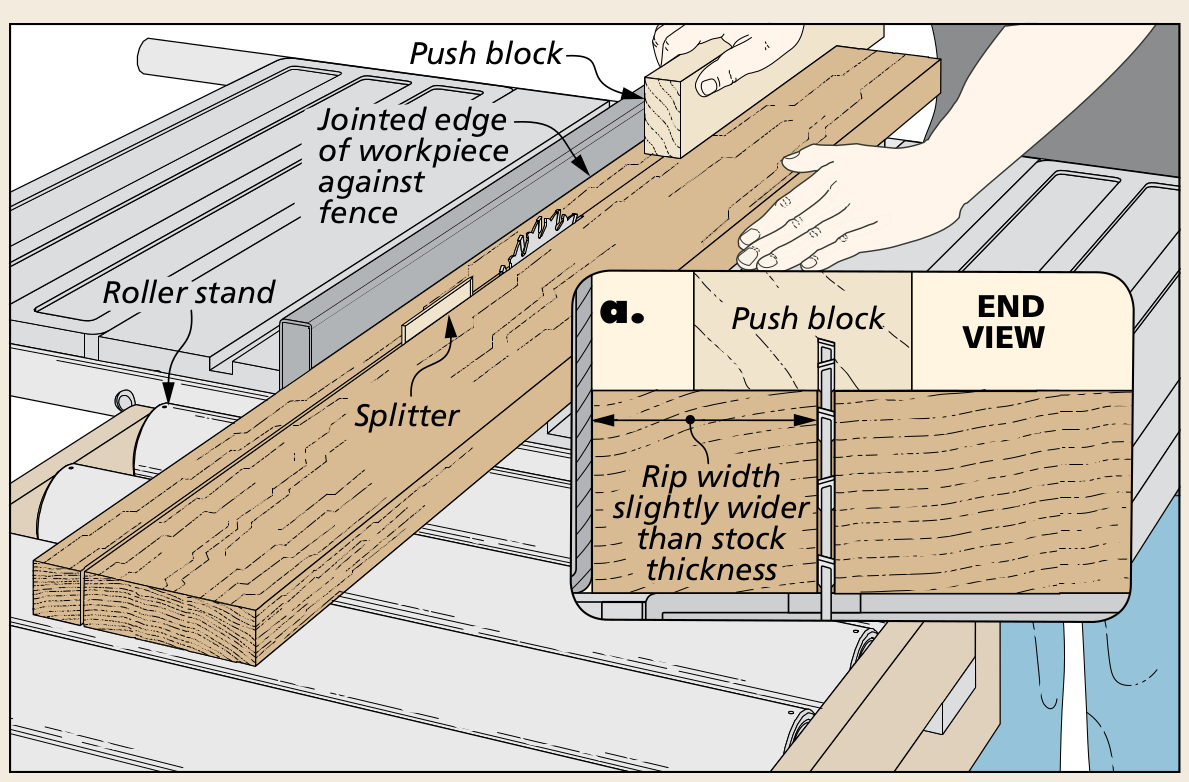
Another concern is the stock pinching the blade during the cut. To avoid this, make sure the splitter is installed on your saw. Finally, use a push block to feed the stock and a roller stand or table for outfeed support, as shown in the left drawing above.
Rip Blade
When it comes to ripping thick hardwood stock, a good rip blade is a must. You want a blade with about 24-30 teeth so there aren't too many in the stock at a time. Any more can cause burning. And a rip blade's deep gullets keep the chips clear.
RIPPING. With your saw tuned up and outfeed support in place, you're ready to start ripping the strips. Two things to keep in mind here are to hold the stock tight against the fence and to maintain a consistent feed rate. The feed rate will be dictated by your saw. Cutting 1 3/4"-thick maple can be a real test. Feed the stock too fast and the saw bogs down, too slow and the stock burns.
Set the rip fence to cut the strips slightly wider than the thickness of the stock. This way, you can clean up the edges in the planer and finish at the desired thickness.
PLANING. A couple passes through the planer will clean up both faces. Making a final pass on the adjacent faces will square up the blanks and offer you more flexibility when assembling the top. When I've finished planing, I like to let the stock rest for a couple days to allow it to stabilize.
LAYOUT & DRY ASSEMBLY. Now that you have a supply of strips planed and ready to assemble, it's time to put them together for the best look. I like to do the layout on a sheet of MDF on my bench. The flat surface of the MDF helps highlight any imperfections in the surfaces of the workpieces. Now is the time to spot them, not when you're clamping the glued-up sections. You may need to make another pass through the planer.
It helps to be patient when working on the arrangement. While the goal is for each piece to be perfectly square and flat, the wood seldom cooperates. In reality, there will usually be some small bows. You can compensate for these by alternating the direction as shown in Figure 1, below. I worked with four strips at a time. You don't want to have to pull any big gaps together with the clamps. When you've put together a grouping you're happy with, mark the faces (Figure 2).
GLUING UP THE SECTIONS. Turn one edge of each piece face up and apply a bead of glue to one surface of each joint. Use a brush or plastic spreader to even out a thin coat. A "rub joint" technique helps to coat both glue surfaces. (Simply rub the glued surface against the opposite piece until you get an even coat on both.)
It's a good idea to have your clamps laid out and opened to the rough size of the assembly. This way, you can simply put them in place and tighten them up. You can use your favorite bar, pipe, or parallel-jaw clamps (Figure 4).
CLEANING UP. After the glue dries, scrape the squeezeout from both surfaces as shown in Figure 5. A belt sander can also be handy for cleaning up stubborn glue and preparing the sections for the planer. (If you run hardened glue squeezeout through your planer, it can nick the blades.) When you're done, plane both surfaces smooth. Of course, you'll need to plane all the sections to an equal thickness for the final assembly.
FINAL ASSEMBLY. After planing the individual sections, assembling them is a breeze. If any of the sections want to slide out of position, simply use a clamp on the joints to hold them in place.
SANDING & FINISHING. The final appearance of the top depends on a good sanding job. You need to be careful not to sand dips or depressions into the surface. One way to avoid this is to use plenty of pencil marks and a straightedge to gauge your progress.
Now just square up the ends using a circular saw or crosscut sled on the table saw. Add an oil finish and you have the perfect kitchen worksurface.
How-To: Glue Up the Top
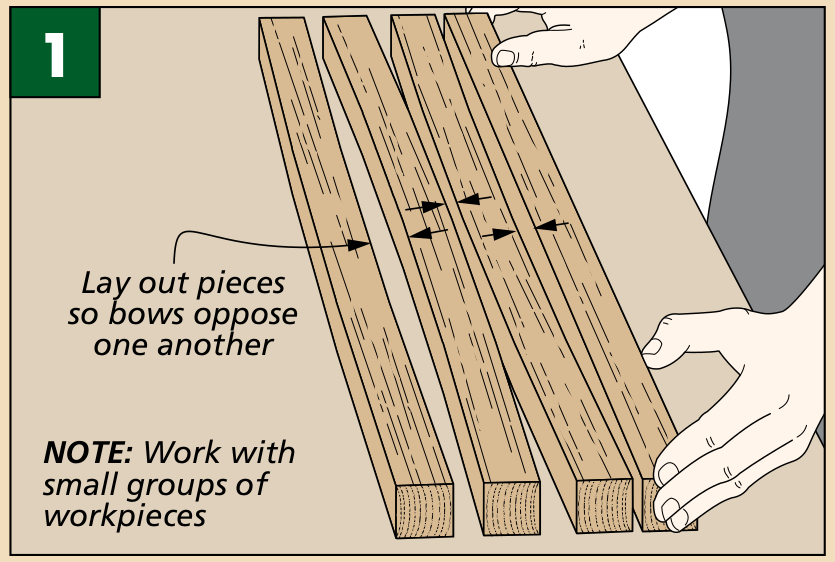
Color and Grain Matching. Lay out the pieces for the best appearance. If the stock is bowed, arrange the bowed faces opposite each other.
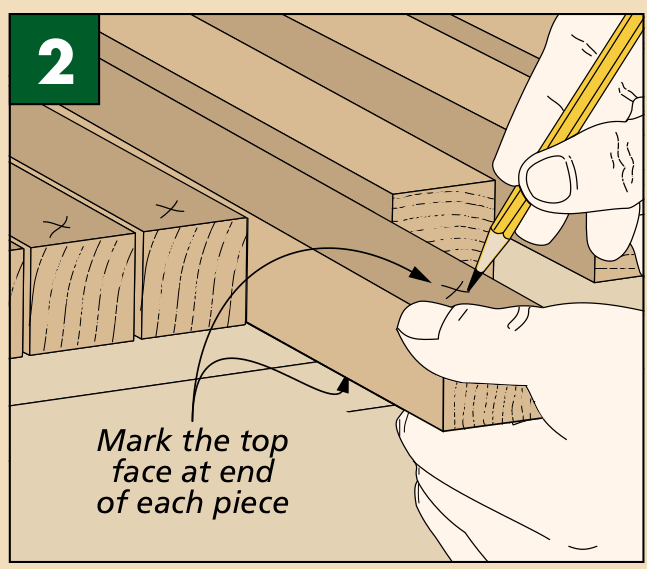
Marking. When you have the best arrangement for each group, mark the top face of each piece.
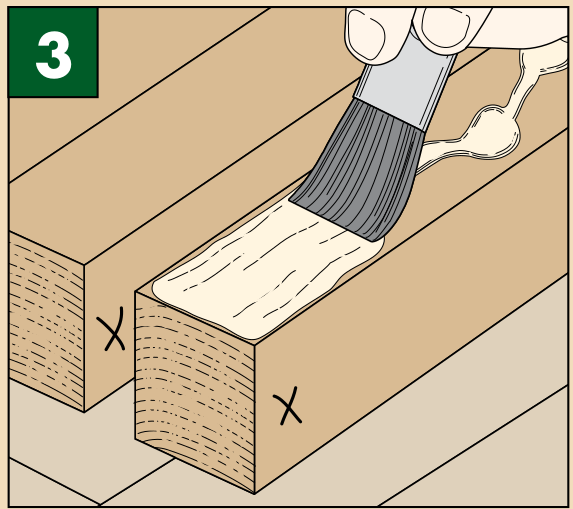
Applying Glue. Use a small brush to spread an even coat of glue on one face of each joint.
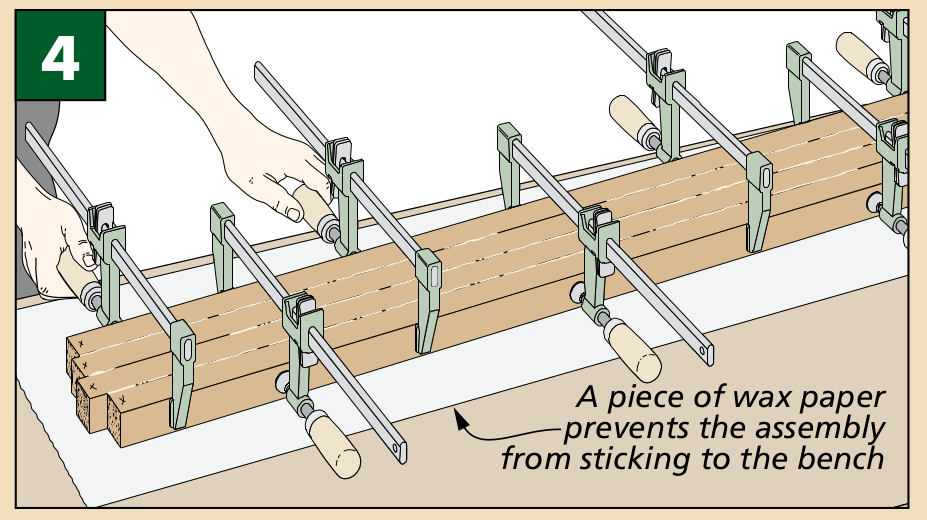
Glue Up the Sections. By working in narrow sections, you have plenty of time to keep each joint flat. This helps minimize planing later.
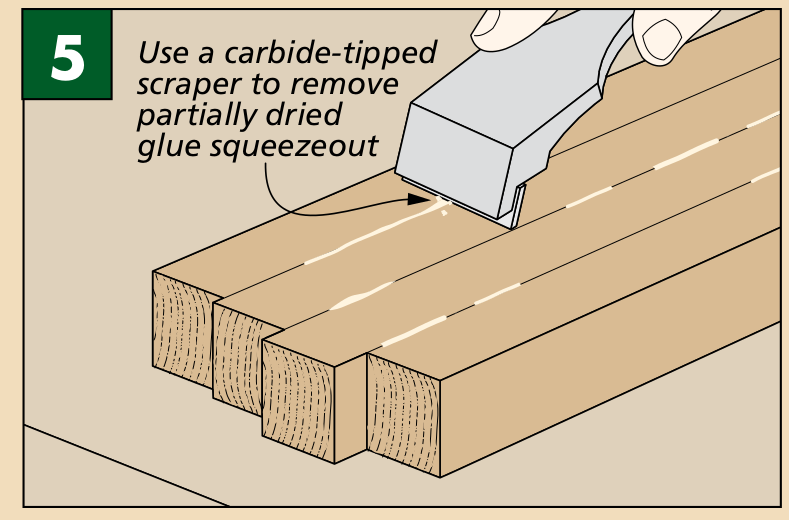
Scrape the Squeezeout. Use a scraper to remove the beads of partially dried glue from both surfaces of each section.
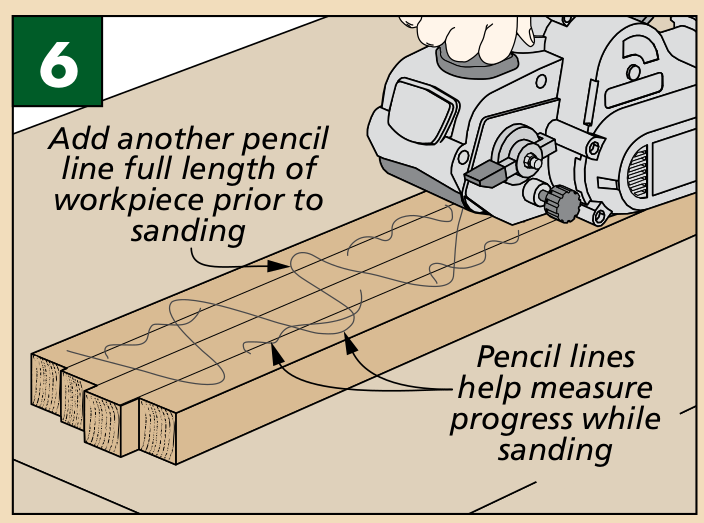
Sanding. If a section slipped in the clamps or otherwise doesn’t come out flat, a belt sander can help flatten one face.
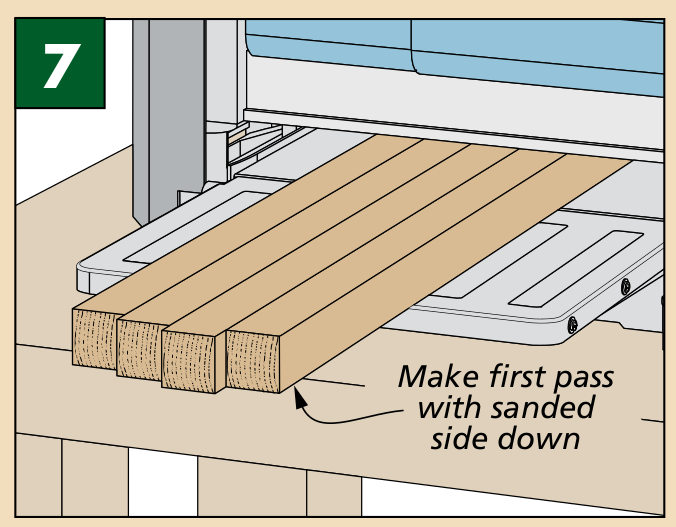
Planing. Once the glue is removed, run each section through the planer until they're all the same thickness.
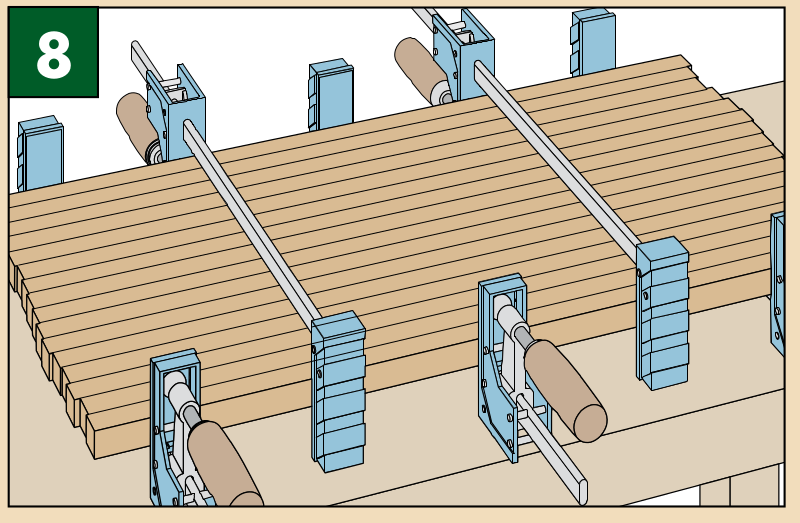
Final Glueup. At this point, you only have three joint lines to worry about as you assemble all the narrower sections.


