Many woodworkers will tell you that a standard block plane is the most versatile hand plane in the shop. But I would offer another candidate for the title of all-around, go-to hand plane — the slightly larger smoothing plane. Although not quite as easy to handle as a small block plane, a smoothing plane can do everything a block plane can do and more — from removing machine marks and trimming parts to size, to edge jointing and final surfacing.
 WHAT’S A SMOOTHER?
Smoothing planes (or smoothers) vary widely in design, but they are easily categorized by their size and main task. A smoother is in the range of 8" to 10" long with an iron about 2" wide. Its main purpose is to put a perfectly smooth surface on the wood. And nothing does the job better. To call the surface produced by a well-tuned smoothing plane “glass smooth” is no exaggeration. In order to get this kind of result from a smoothing plane, you just need a little know-how.
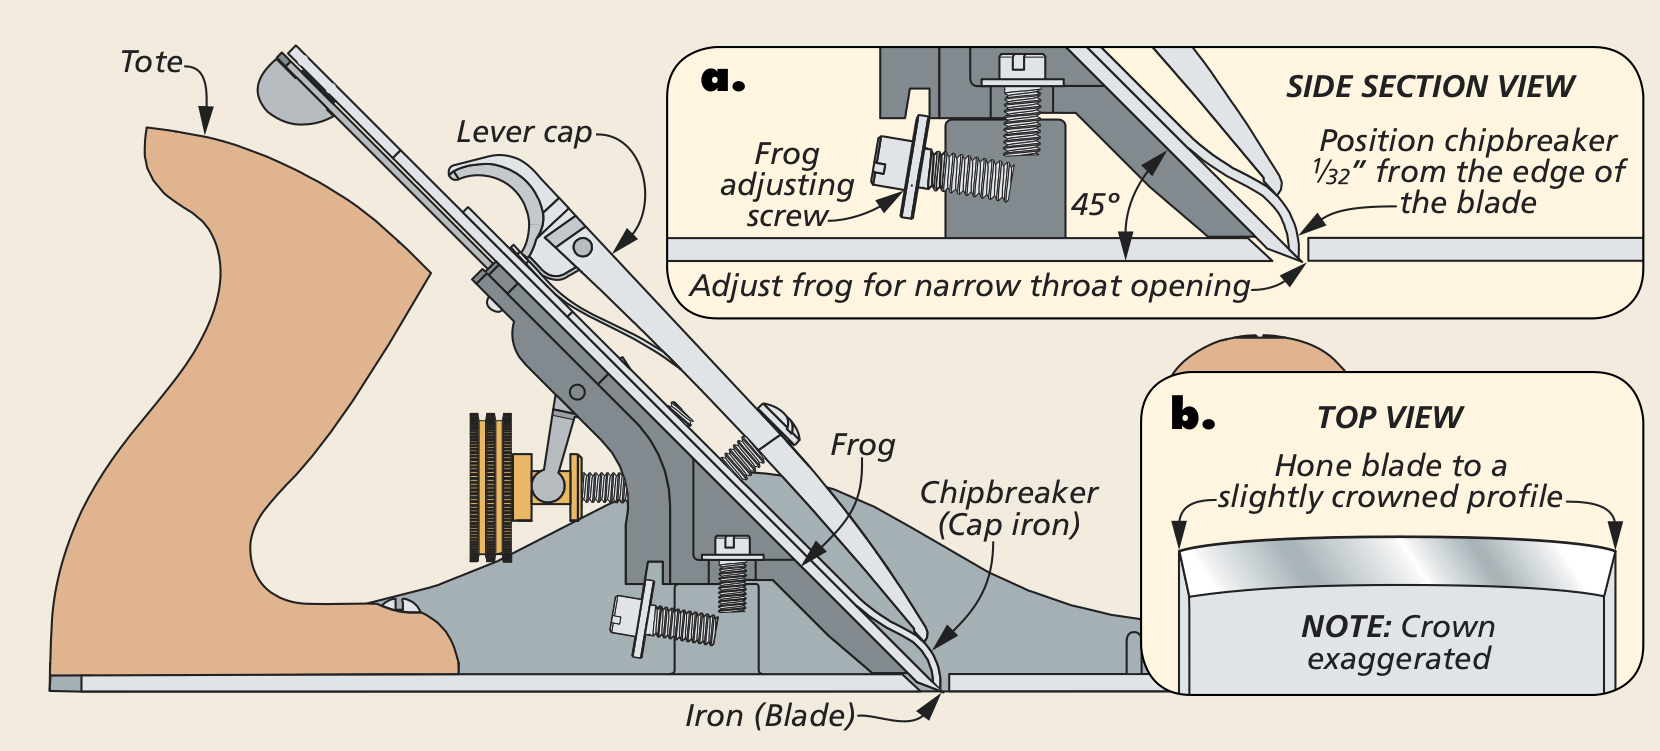
SMOOTHER SETUP. Tuning up a hand plane for optimum use is a lesson in itself. I won’t go into all the details here, but there are a few things you can do regarding the setup of a smoothing plane that will help ensure better results.
For me, the focus is on the way the iron is sharpened. The cutting angle of a standard metal smoother is fixed at 45° by the plane’s frog, as shown at left. This cutting angle, along with a bevel angle of between 25° and 30°, will produce good results in most woods. But I add one more feature to the configuration of the iron — a barely perceptible crown across the edge. A crowned iron prevents the corners from digging into the wood and also gives you fine control of the cut. A narrow shaving using only the center portion of the iron greatly reduces the cutting effort in hard or difficult woods. And you’ll find that the slight undulations left by a crowned iron can’t be seen and can barely be felt. Once the iron is honed, replace the chipbreaker, carefully positioning it about 1 ⁄ 32 " behind the cutting edge. This helps stiffen the iron, keeping it from deflecting and chattering during the cut.
Finally, make sure the frog is adjusted to leave only a very narrow throat opening in the sole. A narrow throat opening supports the wood fibers ahead of the cut, preventing them from lifting and tearing before they’re sliced cleanly.
THE TECHNIQUES.
Using a smoother is all about control. And the first step is to secure the workpiece to a solid surface. There are various ways to accomplish this. A bench vise can hold a board on edge. Bench dogs, a bench stop, or clamps can be used to hold boards or panels laid flat on the bench.

GRAIN DIRECTION. When securing the workpiece for planing, you always want to read the grain. Then position it so you’ll be pushing the plane “uphill,” as in the upper left drawing below. In this orientation, the wood fibers will be pressed flat and cleanly severed rather than being lifted and torn.

FIRM STANCE. Using a smoother effectively is almost like playing a sport — body position can be very important. Pushing the plane along a board to take a shaving requires a fair amount of force, so solid, well-balanced footing is essential. The drawing above illustrates a good planing stance. FIRM & STEADY. A metal smoothing plane is generally fairly heavy — anywhere from 3 to 5 lbs. And for good reason. This mass helps keep the plane in contact with the wood and moving steadily without chattering. But the plane can’t do the job alone. Your contribution is to provide steady forward motion along with firm downward pressure. The Shop Tip below offers help in this regard.
The speed of the stroke can also affect the cut. If tearout is a problem, try slowing down. A slower stroke allows the iron to shear the wood fibers before they can tear.
 EDGE PLANING.
When using a smoother to clean up an edge, I wrap the fingers of my forward hand under the sole to brush along the workpiece and steady the plane, as shown in the photo above. This makes it much easier to control the plane and keep it square on the narrow edge.

SKEWING THE PLANE. It’s hard to hold a plane perfectly straight when planing. It feels more natural to skew the plane very slightly. However, one effect of skewing the plane is a lower cutting angle, as shown in the lower right drawing.
In some instances a lower cutting angle can be can helpful, reducing the effort needed to make the cut. But at other times a very low cutting angle may produce a “riving” action and lead to tearout. The only answer here is trial and error.
A smoother doesn’t have to replace the power sanders in your shop to earn its keep. It’s simply a handy alternative that can often do the job quicker and better.
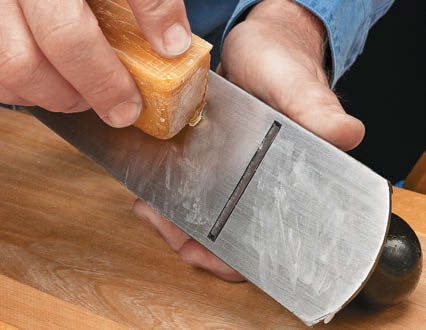
Shop Tip: Wax-On

Beeswax applied lightly to the sole of the plane can greatly reduce the friction resistance that leads to fatigue.


