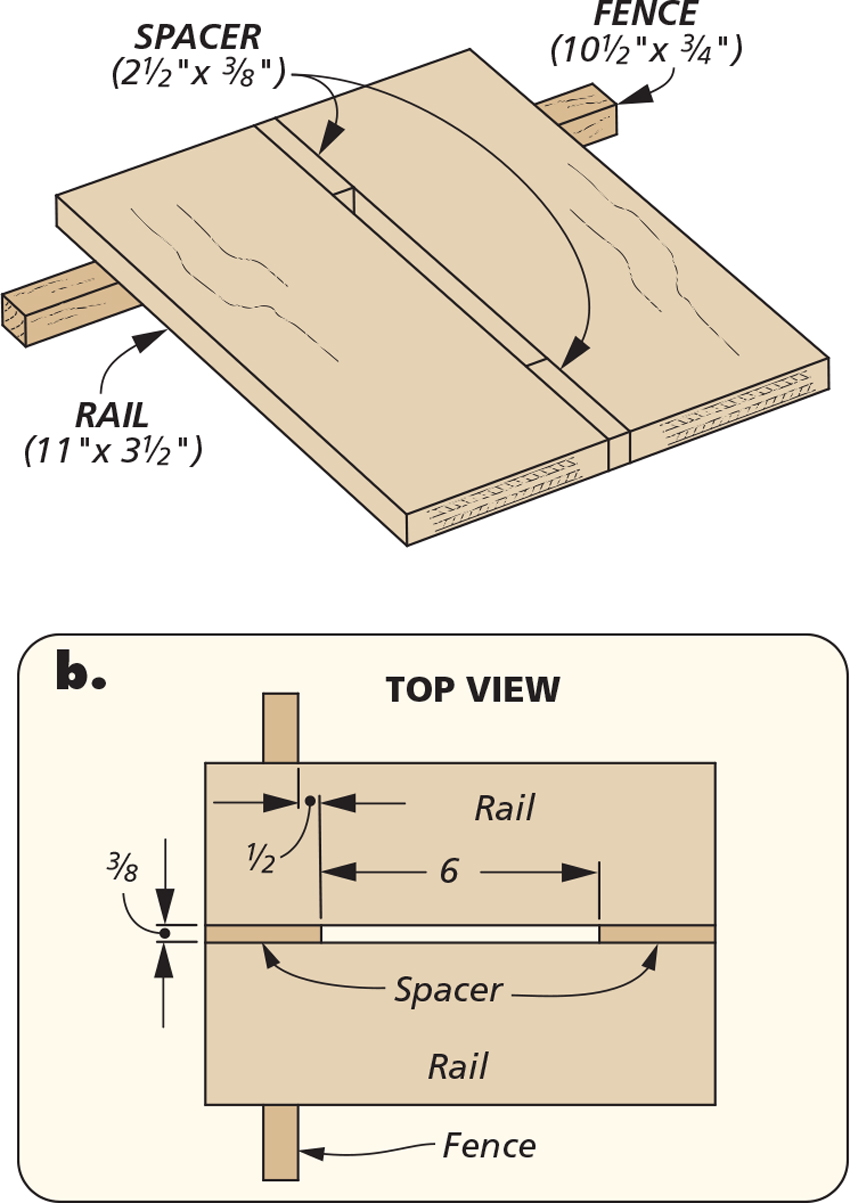
The tried and true quartet of your router, a guide bushing, a straight bit, and a simple jig will make creating stopped dadoes a breeze. Both jigs have mostly the same parts, but they’re tailored to their projects needs.
Fine Tool Cabinet
 The sides of the base cabinet have long stopped dadoes for the top, bottom, and drawer dividers. The jig you see above is designed for the task at hand.
The fence runs along the back edge of the side workpieces and hold the jig in place.
 The rails that are attached to the fence trap and direct the 5⁄8" guide bushing across the side. (Housed in the bushing is a 3⁄8" straight bit.) The stop at the end of the jig stops the dado, leaving you with two corners to square up with a chisel.
Flammables Cabinet
 The jig for the flammables cabinet is shorter and the slot between the rails is narrower to accommodate the smaller bit. To use the jig, measure out how far your dado needs to go. Position the jig against your workpiece and clamp it in place. Run the router through to the end of the dado. You’ll make the cut with a 1⁄4" straight bit, and you’ll also need a 3⁄8" guide bushing (detail ‘a’) to prevent you from cutting into the jig.


