The Best Crimping Tools to Make Secure Electric Connections
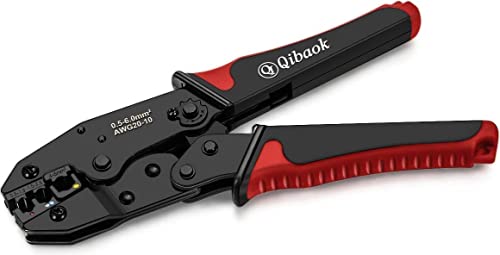
- Most Beginner-Friendly: Qibaok Crimping Tool Shop Now ➔
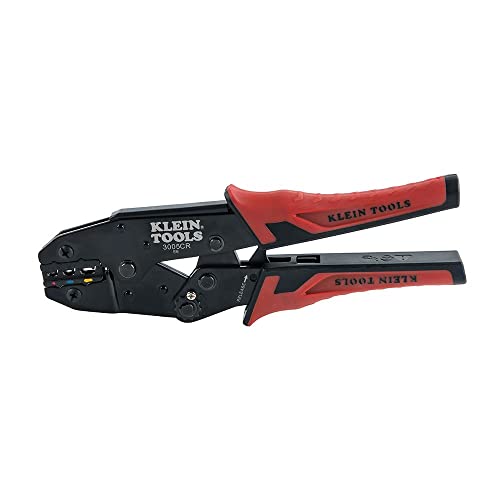
- Best Design: Klein Tools Crimping Tool Shop Now ➔
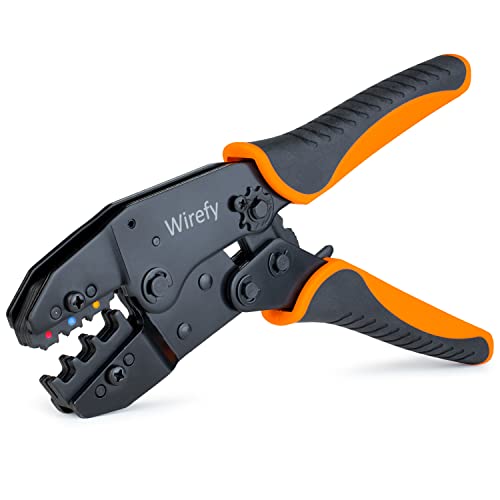
- Ergonomic Grip: Wirefy Ratchet Crimping Tool Shop Now ➔
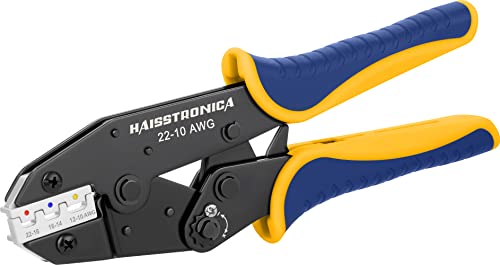
- Easiest To Use: Haisstronica Crimping Tool Shop Now ➔
- Most Budget-Friendly: TICONN Crimping Tool Shop Now ➔
Leading Crimping Tool of 2024 Reviewed in Detail
Most Beginner-Friendly
The Qibaok Wire Crimping Tool is a great option for your toolbox, and it allows you to do simple crimping projects yourself instead of calling a handyman. One great thing about this tool is its color-coded markings for each wire size and its self-release mechanism, making it extremely easy to use even for beginners.
This crimping tool also has a ratcheting mechanism on the handle, allowing you to put just the right amount of force while you crimp. But, what we love the most about this crimping tool is that it features a double crimping die that creates a secure crimp, keeping unwanted pullouts at bay.
Pros
- Features a latch for positioning and locking
- Semi and fully-insulated terminals
- Compression wheel to control force
- High-strength spring for better results
Cons
- Jaw screws might need tightening
Best Design
This Insulated Crimping Tool from Klein Tools is a great choice since it’s got crimping cavities in three different sizes for all your wire projects at home. It allows you to safely add insulated terminals onto your copper wires in just a few simple steps. Even better, this tool comes with a little adjuster to help you change the height and add more force while crimping.
This crimping tool also has a ratcheting handle, which provides you with even crimping each time. You won’t get any uneven edges or bits of wire poking out of the terminal with this handy tool. And, unlike most crimping tools, this one has a comfortable handle that won’t hurt your hand even if you press it hard.
Pros
- Adjustable compound action design
- Features three crimping cavities
- Built-in ratchet for uniform crimping
Cons
- The release trigger is a little small
Ergonomic Grip
If you need to crimp some wires easily and efficiently, try this Wirefly Ratchet Crimping Tool for nylon wires. It helps place a wire connector, so you just have to squeeze the handle to complete the process. Once you have successfully crimped the wire, the handle releases itself, giving you a flawless crimp every time.
The best part about this tool is the star wheel, which allows you to adjust its force. This crimper also has a quick-release lever as well as a non-slip rubber-coated handle, making the task of crimping wires a breeze. Whether you’re a professional or just a home improvement enthusiast, you won’t be disappointed by this tool.
Pros
- Ergonomic, cushioned handles
- Will not tear connectors
- Backed by a lifetime warranty
Cons
- Might be a little difficult to press
Easiest To Use
The Haisstronica Crimping Tool is an amazing option for adding different kinds of wire terminals to your copper wires. It also has color coding on it, so you can use the terminals according to the given color. What’s more, this tool has a little star wheel that allows you to adjust the force applied to the wires to get the desired results.
Plus, it has a ratcheting mechanism that allows you to place the connector in the right place before you insert the wire. And, for added utility, this crimping tool has a sturdy, vibrantly-colored nylon handle, making it perfect for any wire work enthusiast.
Pros
- Indentation doesn’t damage the connector
- Color-coded for quicker identification
- Ergonomic, non-slip nylon handle
Cons
- Doesn’t release until closed all the way
Most Budget-Friendly
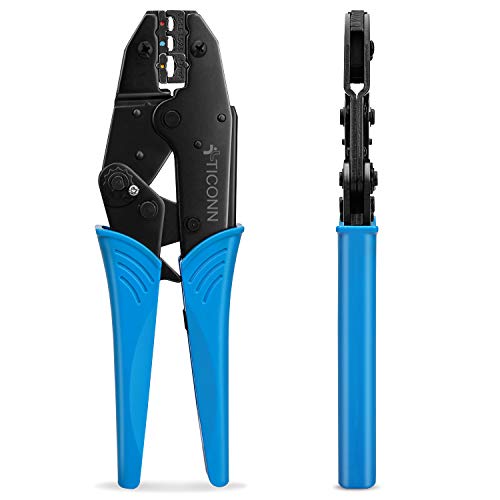
The TICONN Wire Crimping Tool is made from heavy-duty materials, ensuring that you always get uniform crimps. With a unique ratcheting system, you can easily apply the connector, and the handle has a powerful grip to ensure that you don’t have to strain your hand too much. Whether you are a professional contractor or a DIYer, this crimping tool is great for working on different projects because you can adjust the crimping force with the star wheel.
Many tools tend to break down over time, but you won’t have that problem with this crimping tool because of its durable construction. Whether it’s fixing a broken wire or attaching a terminal for a socket, using this tool can also help make your wires last longer by creating an airtight seal.
Pros
- Non-slip, plastic-coated handles
- Ratcheting function for wire connectors
- Professional-grade crimping die
Cons
- A bit hard to open
Finding Your Next Crimping Tool: A Buyer’s Guide
Considerations for Buying a Crimping Tool
Supported wire sizes
You should first check the wire size that your crimping tool can support. This is because it gives you an idea about the type of wires you can crimp in terms of their thickness and diameter.
Wires generally come with a thickness rating expressed as American Wire Gauge (AWG) and most models range from 12 to 24 AWG. So, you should pick a versatile tool that you can count on for crimping wires of any size.
Crimping cavities
If you are a professional contractor who often has to crimp wires of different sizes, you should get a crimping tool with different cavities. In other words, a crimper with multiple cavities can help you crimp wires of different thickness ratings without having to switch between different crimping pliers.
How To Use a Crimping Tool
Remove wire casing
The first step is to remove the rubber casing on your wire. Make sure to not cut it all the way through, or you might damage the copper inside. Instead, just make an even cut around the wire and slip the casing off. Once the copper is exposed, you’ll be ready for the next step.
Add the connector
There are plenty of connectors to choose from, such as an open barrel connector. With this type of connector, you can easily lay the wire inside before you crimp it. Then, use the ratcheting mechanism on your crimping tool to help you place the connector in the right-sized spot inside the jaws. Afterward, you can use the star wheel to adjust the force depending on how tight you want the crimp to be. The tighter you crimp your wires, the less likely they are to come apart over time.
Crimp the wire
Then you insert the wire into the connector and simply press the handle to crimp it, pressing them together easily. With some crimping tools, this might require a bit of force, but it’s the best way to get the job done. If you feel like the placement is wrong, you can use the quick-release button to open up the jaws before the crimp is complete.
Once this step is done, you’ll have a neatly crimped wire.
Why You Need a Wire Crimper
Crimping wires is a great way to keep them protected from dust and sand, which can make your wires last longer. It is also a less messy process than soldering and fairly easy as well. With the help of a crimping tool, you won’t need anyone else to get a neatly crimped wire at home.
Crimping is also more reliable since it firmly presses the connectors into the wire, making an airtight seal. Most crimping tools can be quite costly, but we’ve mentioned affordable and good-quality ones in this guide.
People Also Asked
Should I solder my crimp after it’s done?
No! There’s no real need to solder or even use heat compression on your crimp after it’s done. This is because most crimping tools are reliable enough to create a tight seal on the wire by pressing it into the connector.
Why is there color coding on my crimping tool?
Some crimping tools are color coded to help you pick the right wire size for each terminal, so you can quickly identify the needed crimper from a distance without having to juggle tools.
Why should I opt for crimping rather than soldering?
Crimping offers a stronger, more reliable connection when compared to soldering. The main difference is that soldering uses heated metals to connect wires to the connector and this metal might degrade over time. Plus, soldering is much easier than crimping.
Article Contributors
The Woodsmith Review Team’s product reviews and in-depth guides are here to help you choose the best tools and gear to build great-looking projects confidently. Woodsmith is reader-supported: When you buy through links on our site, we may earn an affiliate commission. Large language models (like Artificial Intelligence) may have been used in the research and creation of the content.
Inquiries regarding specific articles or product testing should be sent to aimperiapt@gmail.com

